New Resource :
- Unit testing support
- Android Studio 1.1.0 (Beta 4) and Robolectric 2.4
- Robolectric Installation for Unit Testing
目前在網路上的 Android Studio unit test 的範例可以說是少得可憐,尤其是 Android Studio 和 Gradle 這兩個大傢伙不斷低更新,要找到比較符合現狀的組合又更少了。
android-unit-test 和 android-studio-unit-test-plugin 這兩個 repo 來設置 Robolectric 是我目前看到最簡單的設定。
建置環境:
- OS X 10.10.2
- JDK 1.7.0_71
- Adnroid Studio RC 1
- Gradle 2.1 (應該不重要)
Step 1 安裝 AS 外掛
安裝Android Studio Unit Test Plugin
Preferences -> Plugin -> Install plugin from disk
接著重開 AS
Step 2
Android-studio-unit-test-plugin Requirements
- Android Studio 0.6.0+
- Android Gradle Plugin 0.11.0+
- JCAndKSolutions’ android-unit-test gradle plugin 1.5.0+
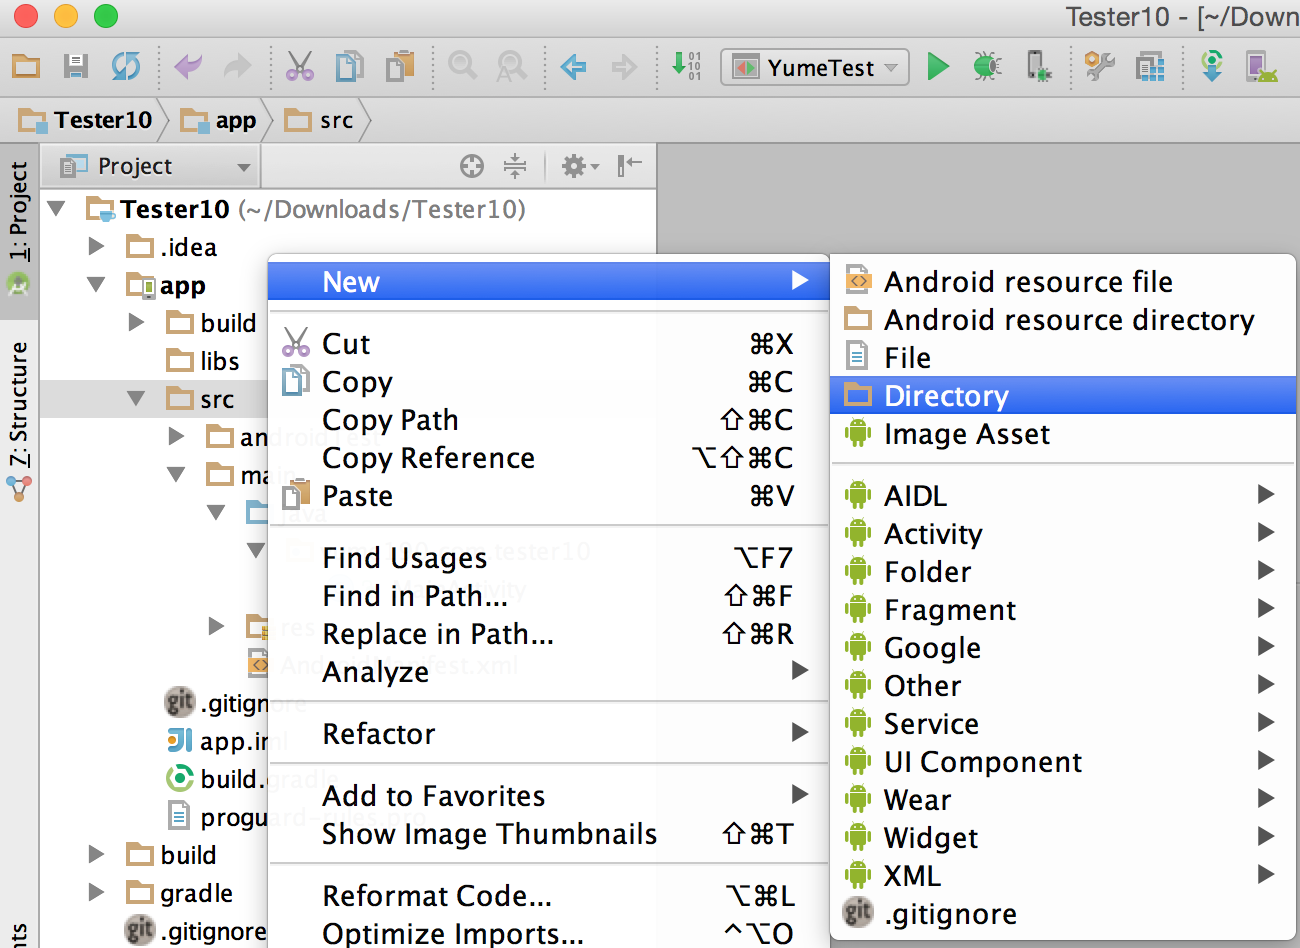
在 app/src 底下新增目錄 test/java/full/package/name/test
例如 Package Name 為 yume190.com.tester
所以就新增 test/java/yume190/com/tester/test 目錄
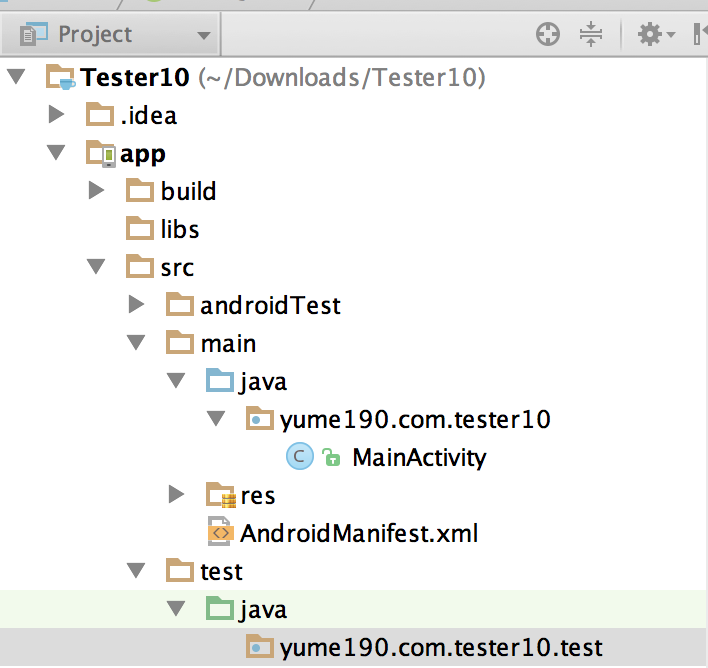
於是目錄結構就會變成這樣
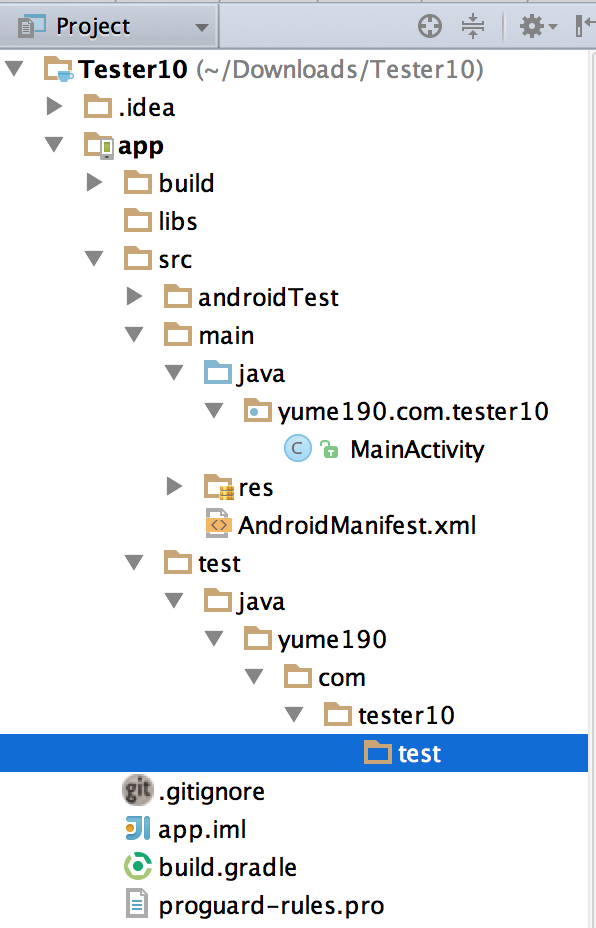
這個時候會看見 package 分散成多個資料夾。(代表AS不認得test 資料夾)
所以要開始設定 android-unit-test gradle plugin
在 project/build.gradle 新增 classpath 'com.github.jcandksolutions.gradle:android-unit-test:2.1.1'
1 | buildscript { |
在 app/build.gradle 的 android 區塊下面加入 apply plugin: 'android-unit-test'
接著新增 dependencies
testCompile 'junit:junit:4.11'
testCompile 'org.robolectric:robolectric:2.4'
1 | apply plugin: 'com.android.application' |
此時 Sync 一下
PS : 其實android-unit-test第四點之後也都很重要,例如受測的 class 要放在哪個目錄,以及命名必須是xxTest.java等等…。
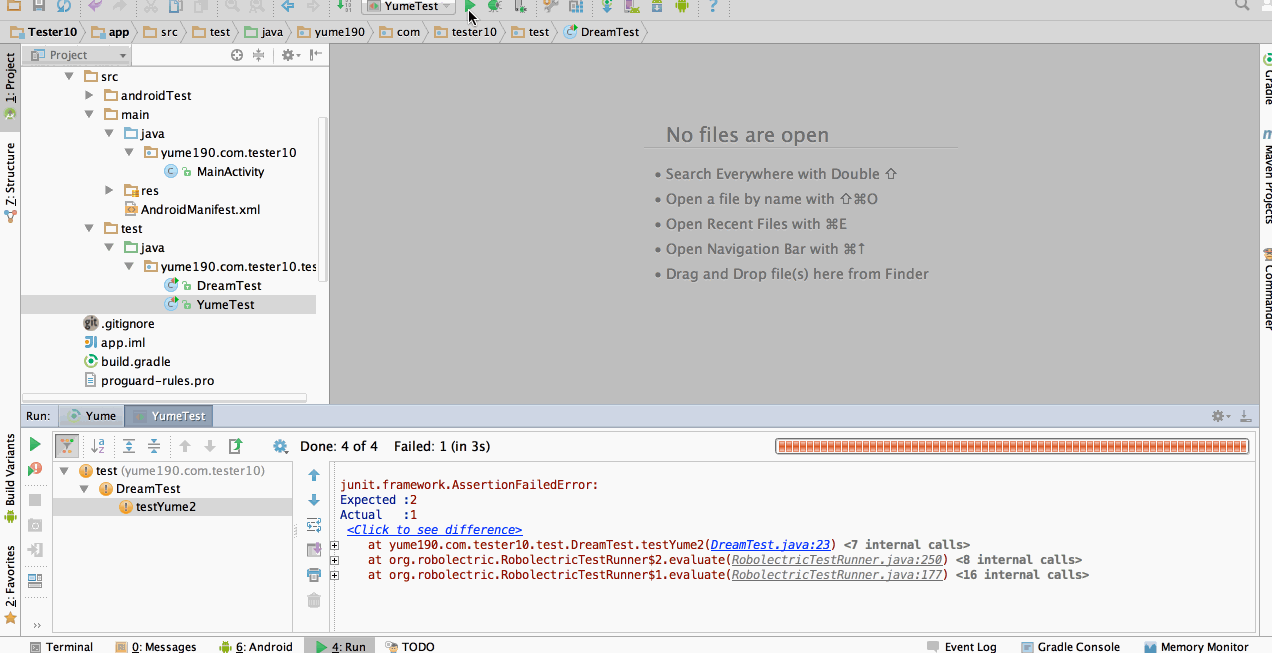
Step 3 加入Test
這邊先放一個不能過的測試,at src/test。
# 可以先用 gradle tasks 查看所有任務
# 看看有沒有叫做 test 的 task
# 然後用下面的指令跑測試
gradle test
1 | package yume190.com.tester10.test; |
Step 4 搭配AS IDE
- Add tasks.findByName(“assembleDebug”).dependsOn(“testDebugClasses”) to your build.gradle to force the test classes to be compiled whenever your project is compiled.
- Go to Edit Configurations and add a new gradle configuration that runs the task testClasses. Then in your junit configuration, below Before launch, click + -> Run Another Configuration and add the gradle configuration you just created.
到edit configurations做設定
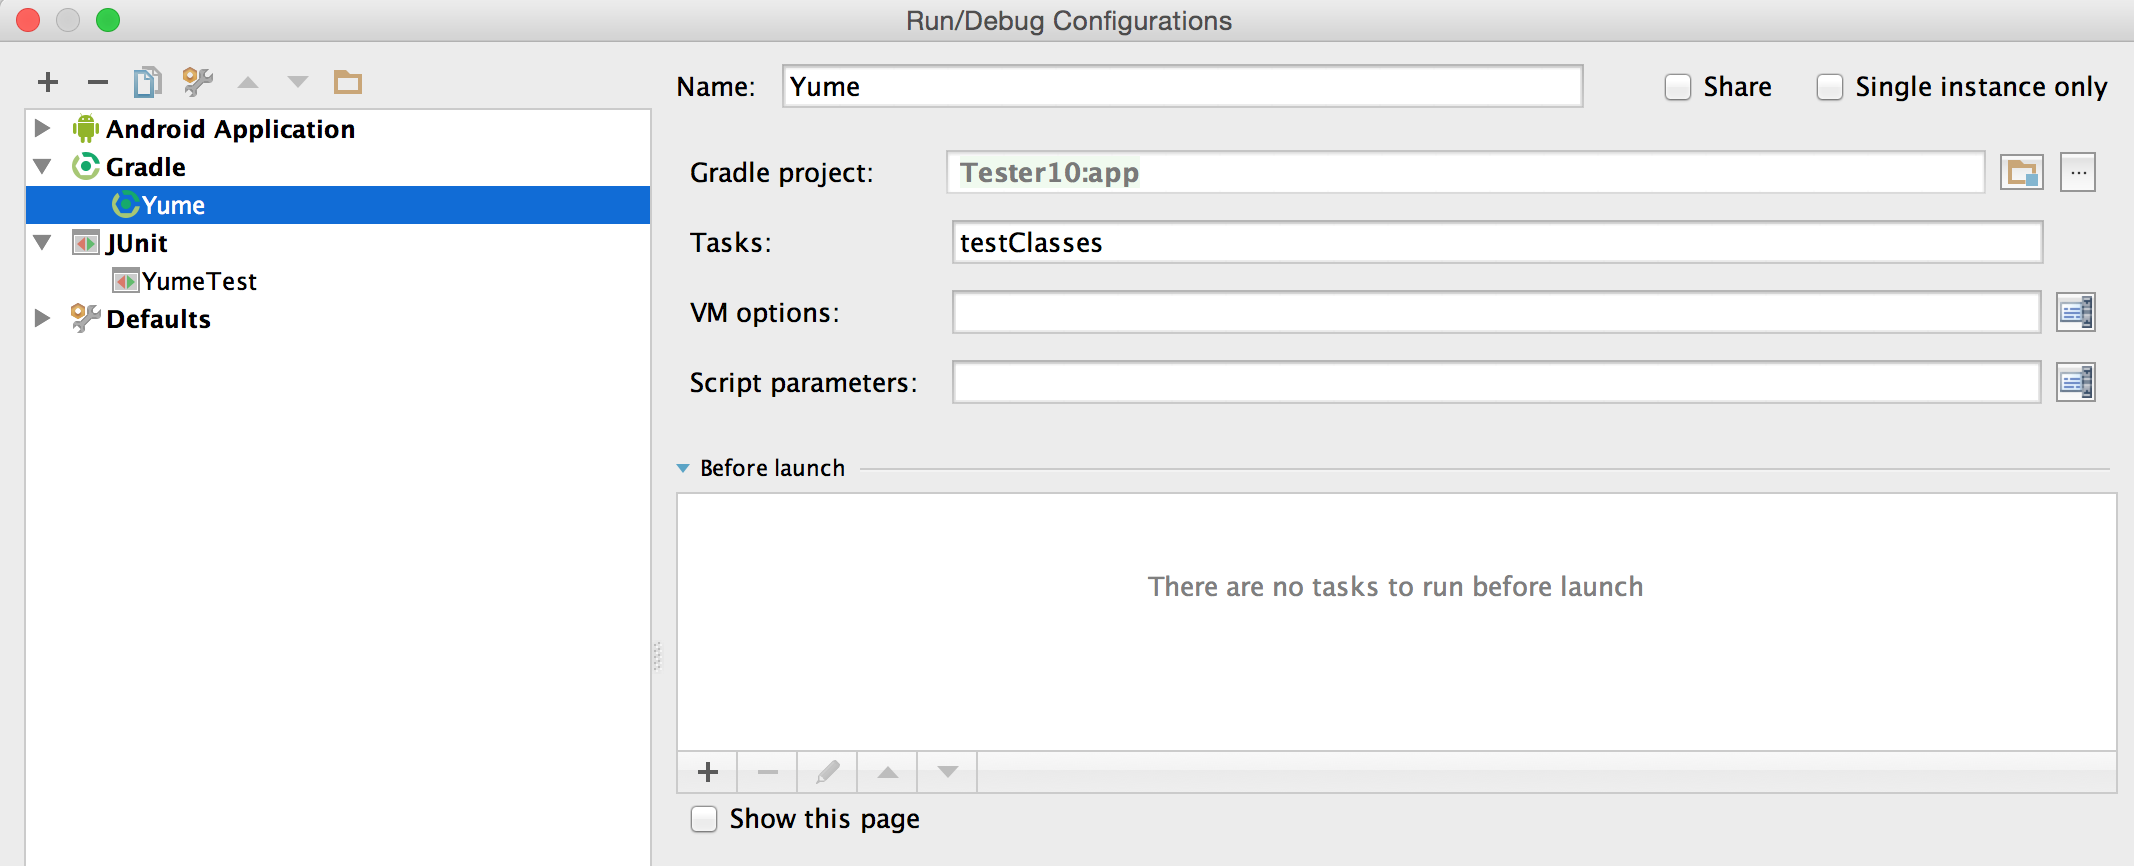
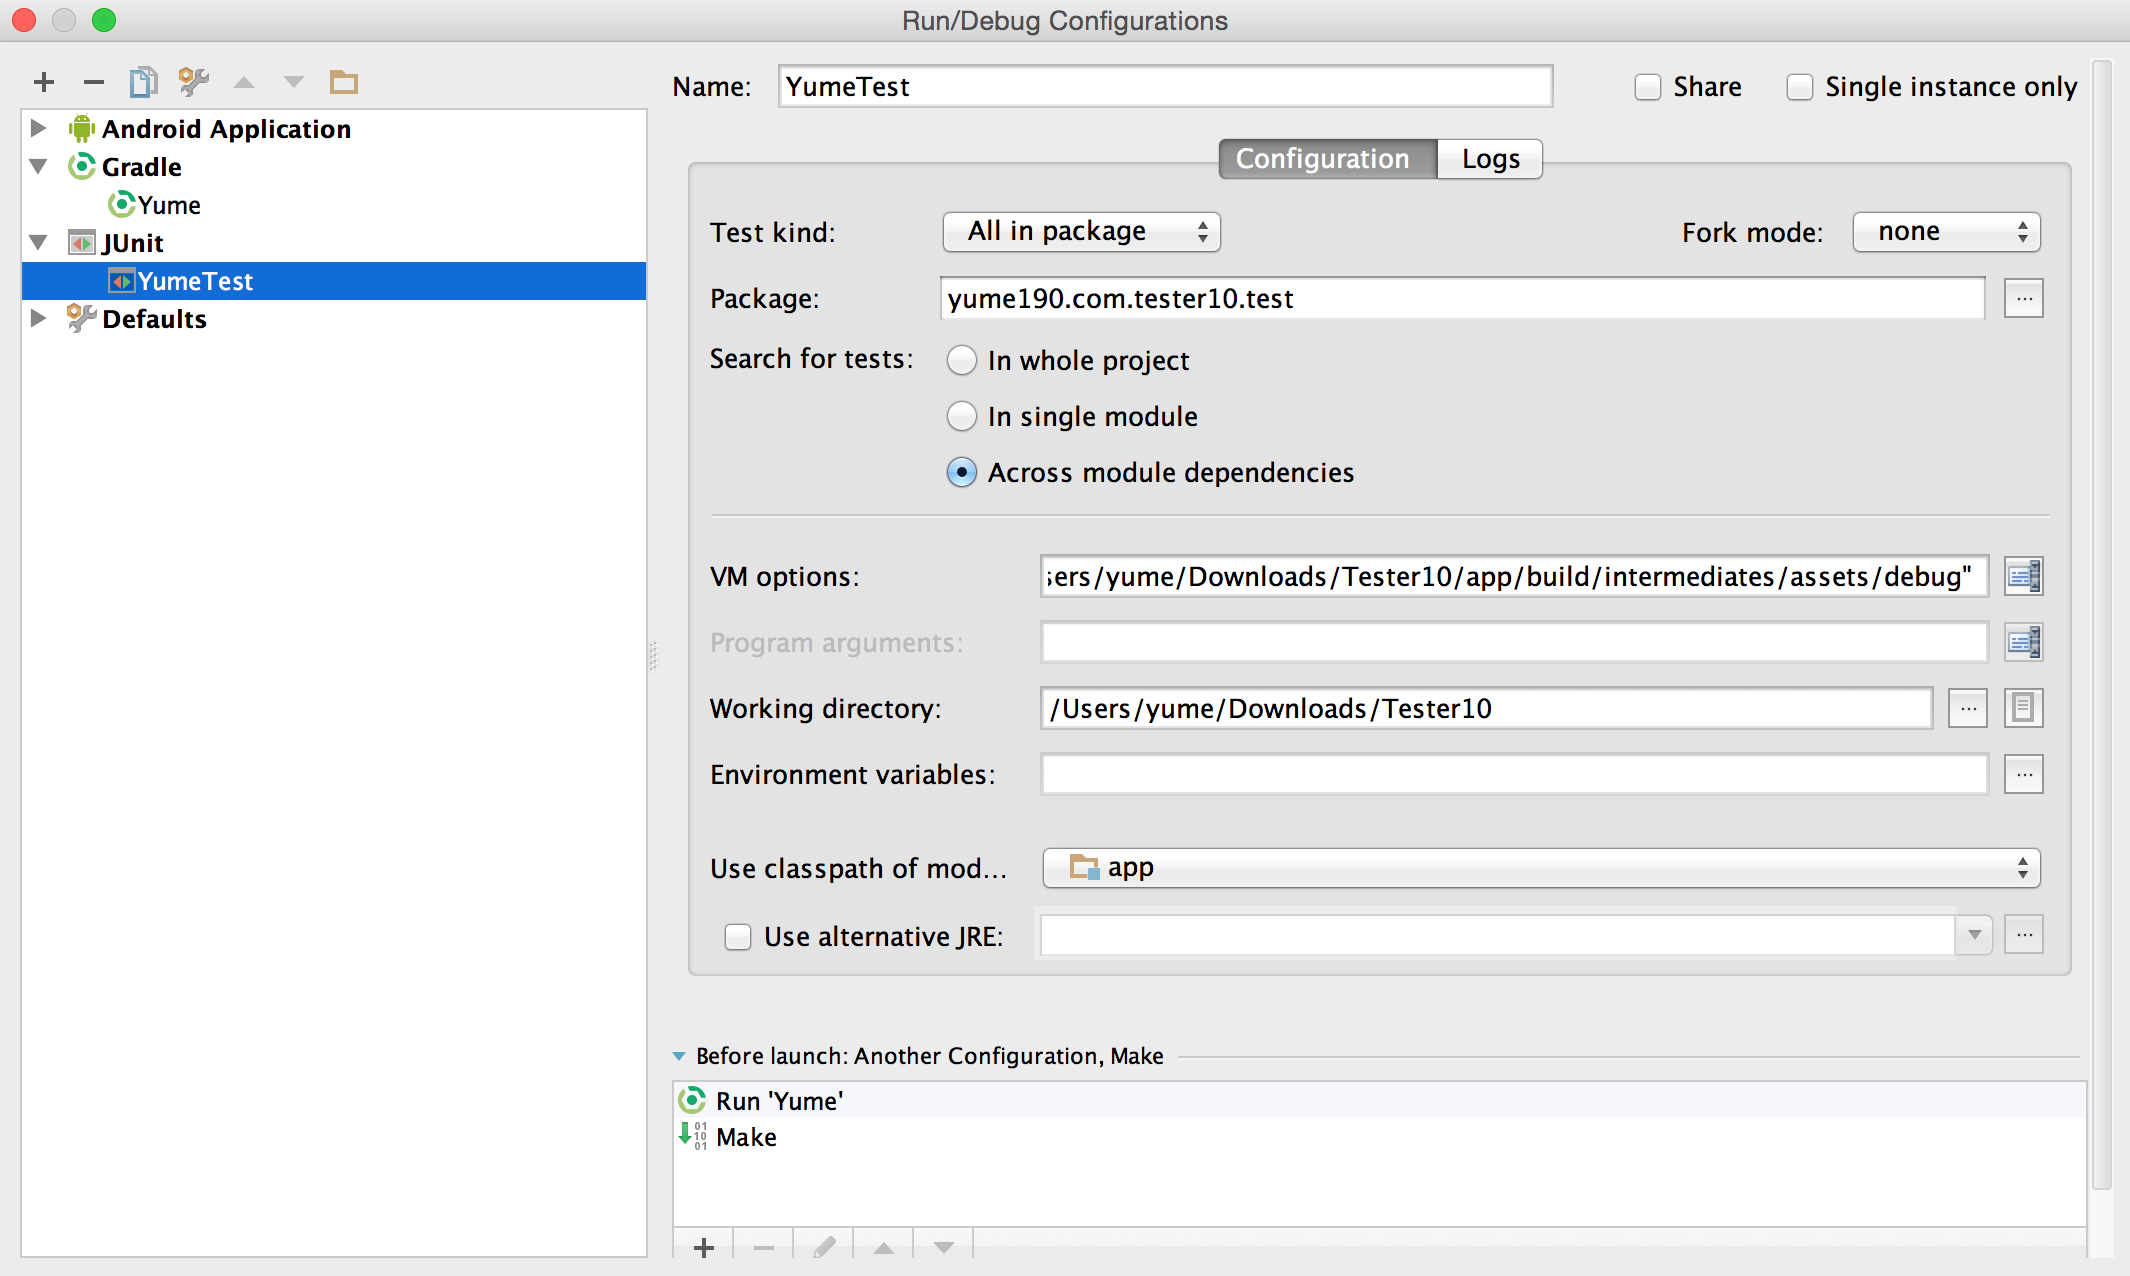
把 tasks.findByName("assembleDebug").dependsOn("testDebugClasses")加入app/build.gradle
1 | apply plugin: 'com.android.application' |
自己弄的Sample
其他Source :
- 比較推薦這篇How to setup unit testing in Android Studio
- Android Unit Testing in Android Studio and CI Environments
- 2 Modules Android project with Robolectric, Gradle, Android Studio
- Android: Robolectric does not support API level 1
- [TUT] Android Gradle App with Robolectric JUnit tests
- Gradle test fails with error