Repo來源:CustomView
相關檔案:
Step 1
建立一個
CustomView類別,並且繼承自UIView
ex: CustomView.h & CustomView.m然後,接著建立同名的xib檔案
ex: CustomView.xib
Step 2
- 選到xib檔
- 點選
File's Owner - command + option + 3
- 輸入上你的
Custom Class名稱
ex: CustomView
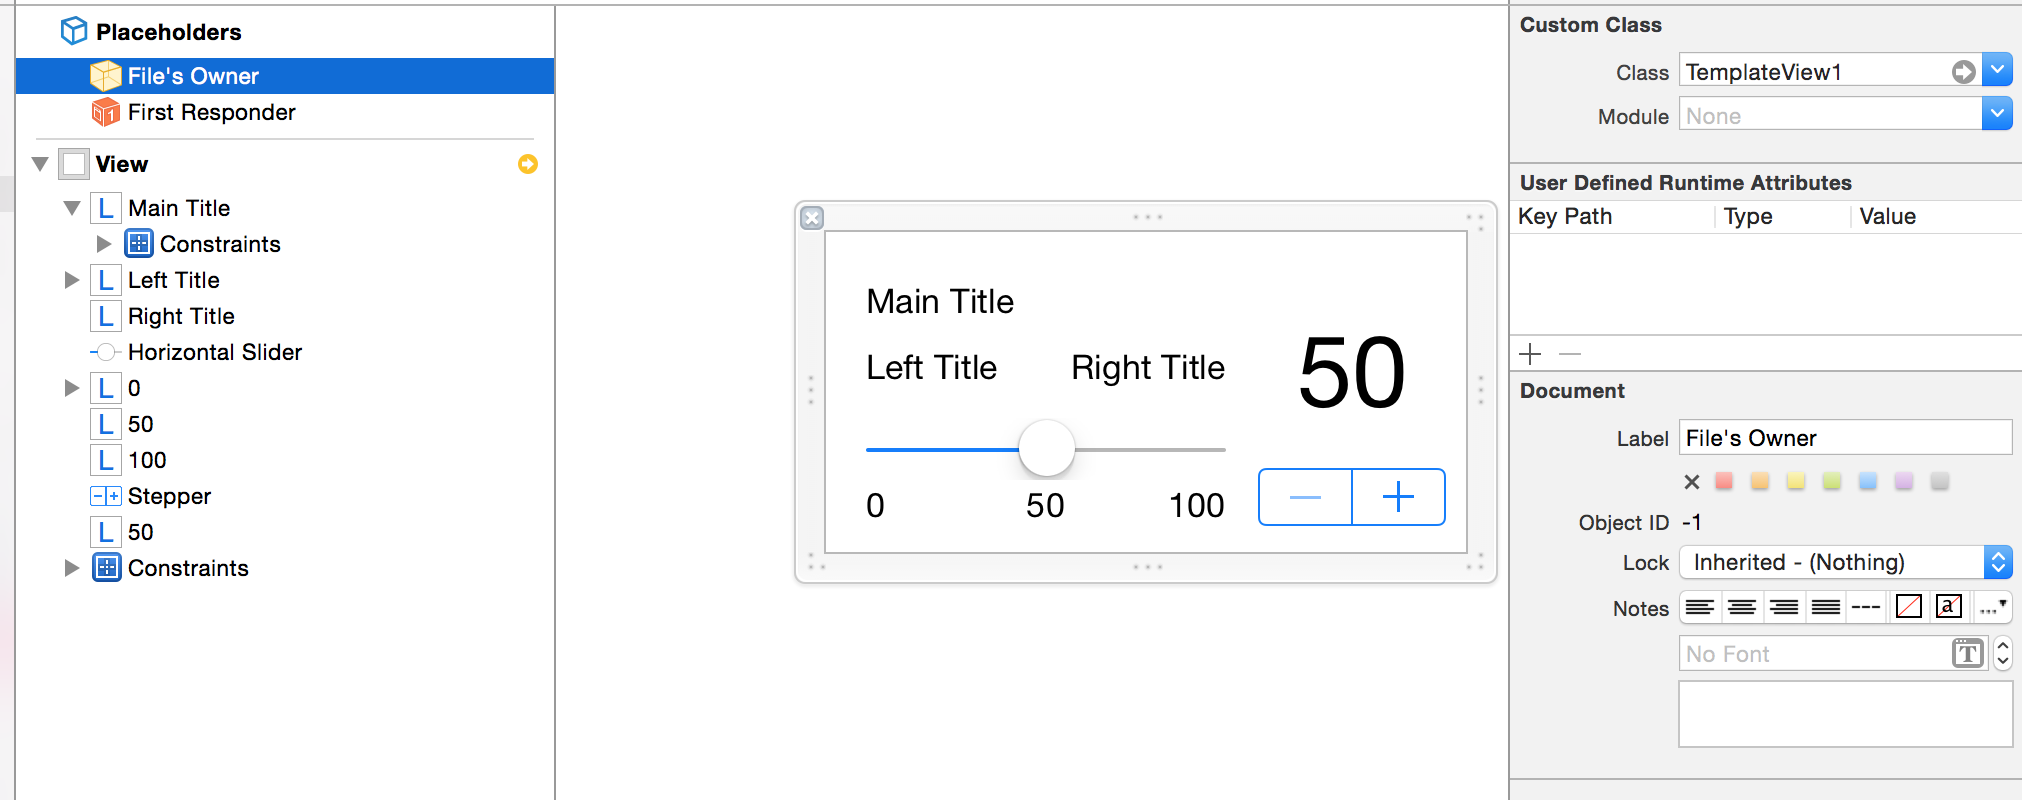
下圖是TemplateView1.xib,因此點選File's Owner後,填入TemplateView1
Step 3
- 實作
initWithCoder方法
1 | - (void) setup{ |
Step 4 (選擇性實作)
- 如果你想要在Storyboard輸入你的相關參數
- 在你的Storyboard拉入一個
UIView - 點選剛剛的UIView -> command + option + 3 -> 輸入你的Custom Class name
- 找到
User denfined Runtime Attributes,並且填入你想輸入的參數
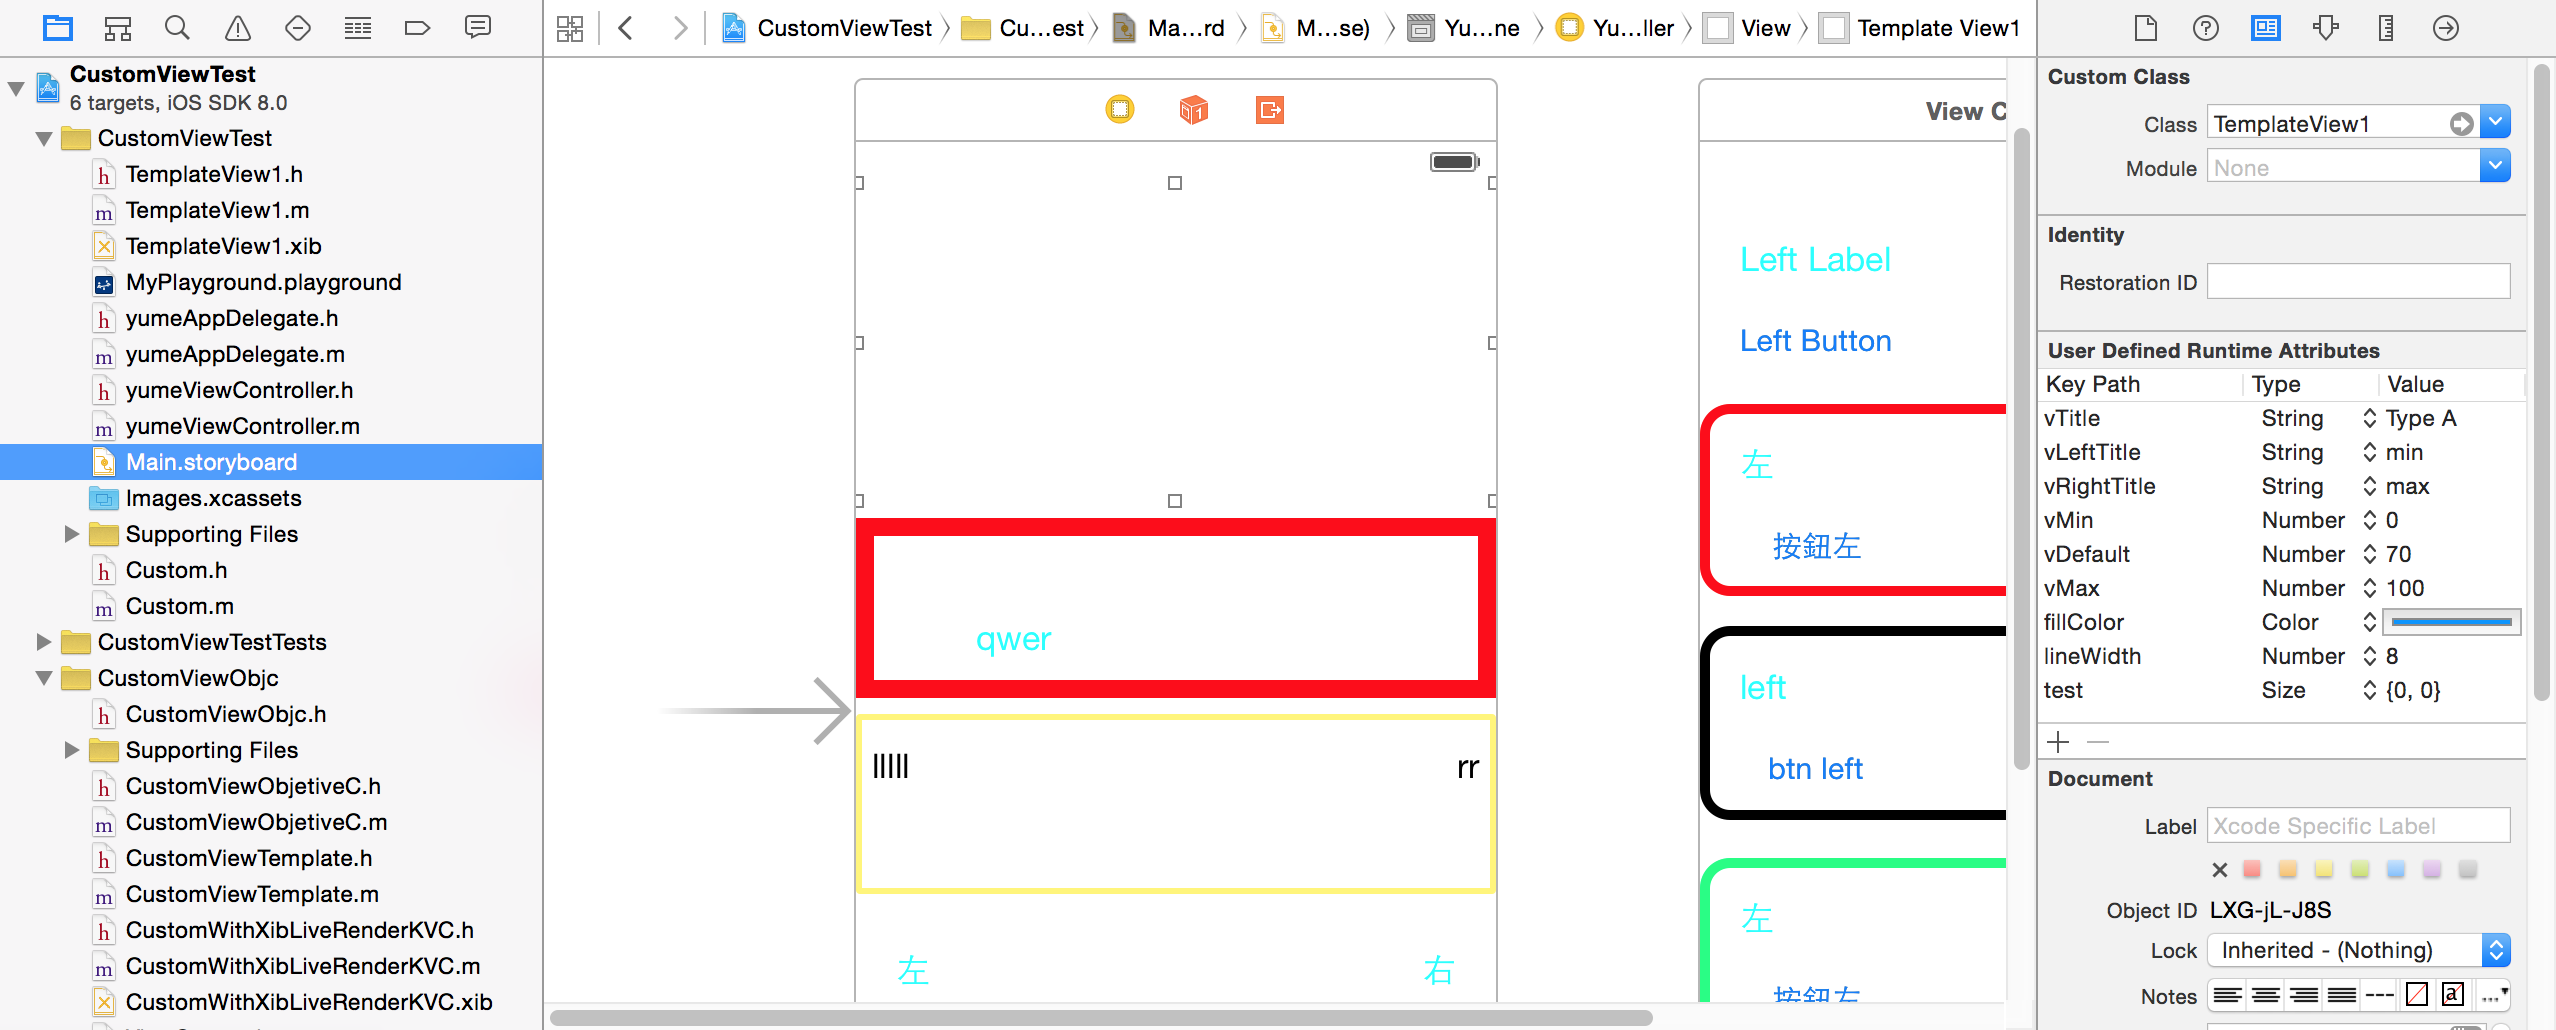
| Key Path | Type | Value |
|---|---|---|
| vTitle | String | the title |
- CustomView.h建立個property
1 | @property (assign) NSString* vTitle; |
- Implement
awakeFromNibin CustomView.m
1 | - (void)awakeFromNib { |